This guide explains how to update your iPhone device settings following the recent change of email servers. As part of our ongoing service improvements, we have recently migrated to new mail servers to ensure a smoother and more reliable email experience.
Updating the settings is a simple task—you only need to change two values: the incoming and outgoing mail servers. Replace the old servers (mail1.webnode.com, mail2.webnode.com, or mail3.webnode.com) with the new ones: imap.mail.webnode.com (incoming) and smtp.mail.webnode.com (outgoing). All other email client settings remain the same.
TIP: You can find guides for updating other email clients in our Help center: How to update email client settings for the new mail servers. The values described in that guide are also valid for most other email clients and can be used with older versions of iPhone.
Settings update
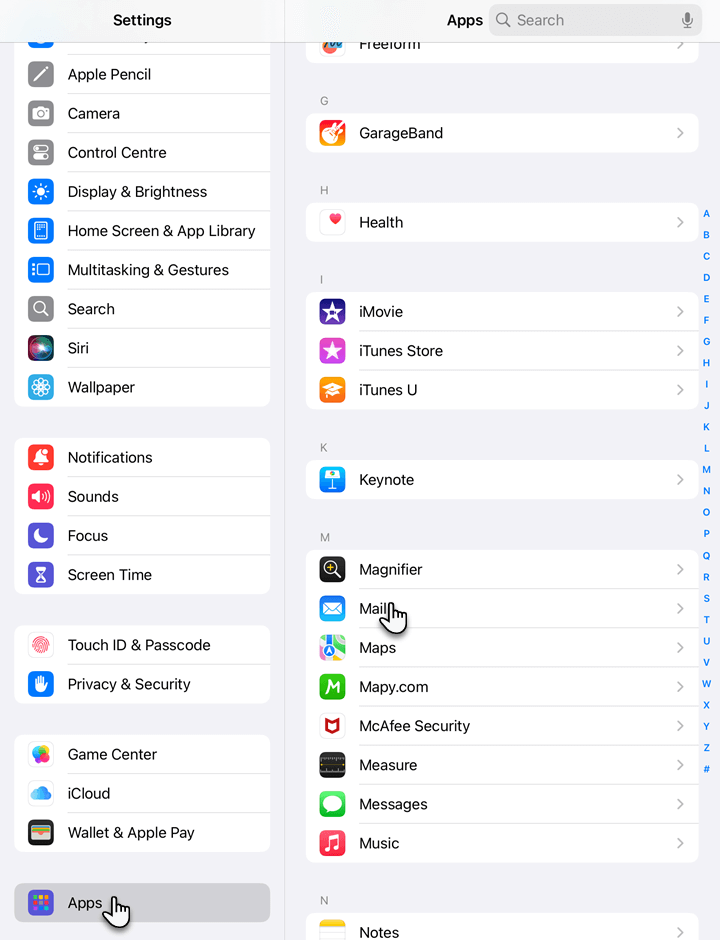
1. On your iPhone or iPad, open Settings, go to Apps, and select the Mail app.
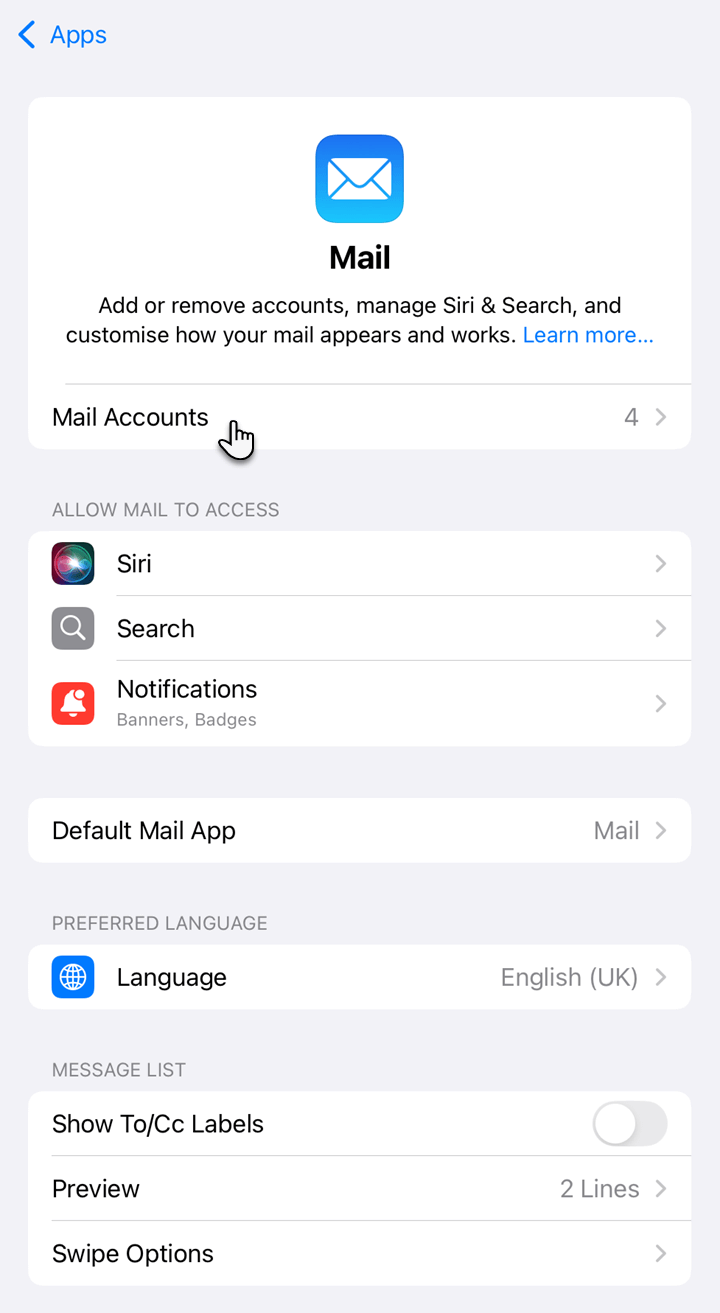
2. Tap Mail Accounts.
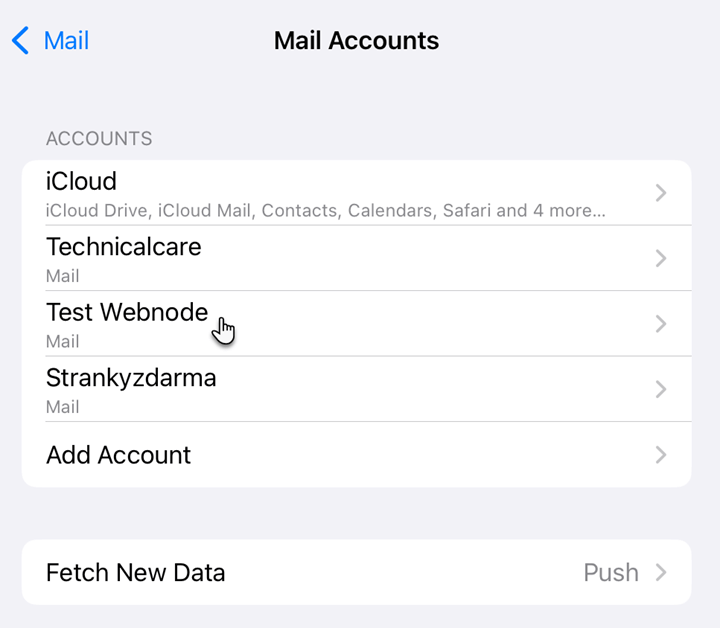
3. Choose the email account.
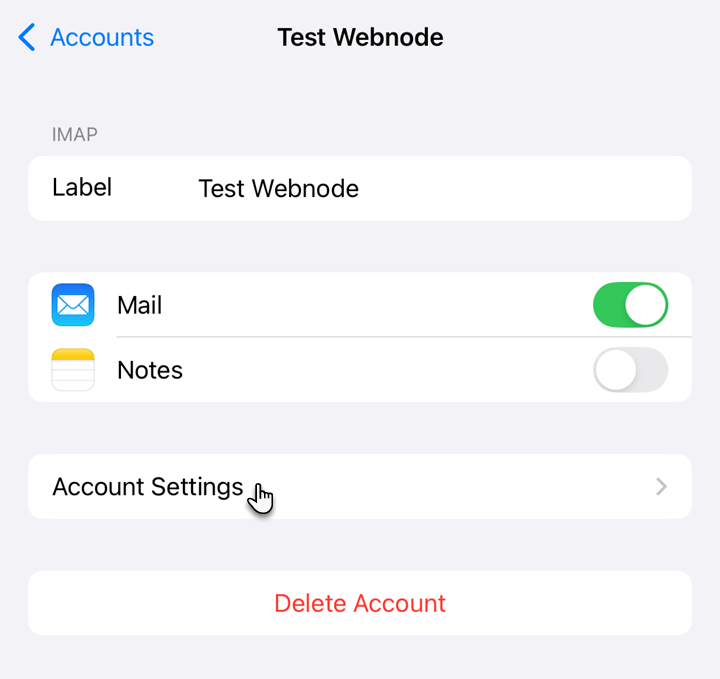
4. Select Account Settings.
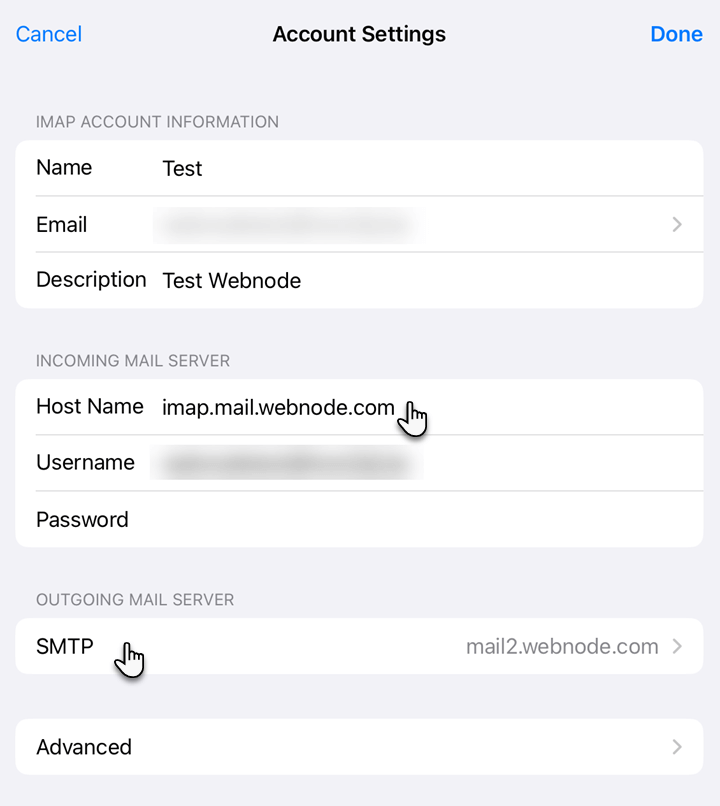
5. In the Incoming Mail Server section, change the Host Name field to imap.mail.webnode.com. Next, select SMTP under the Outgoing Mail Server section.
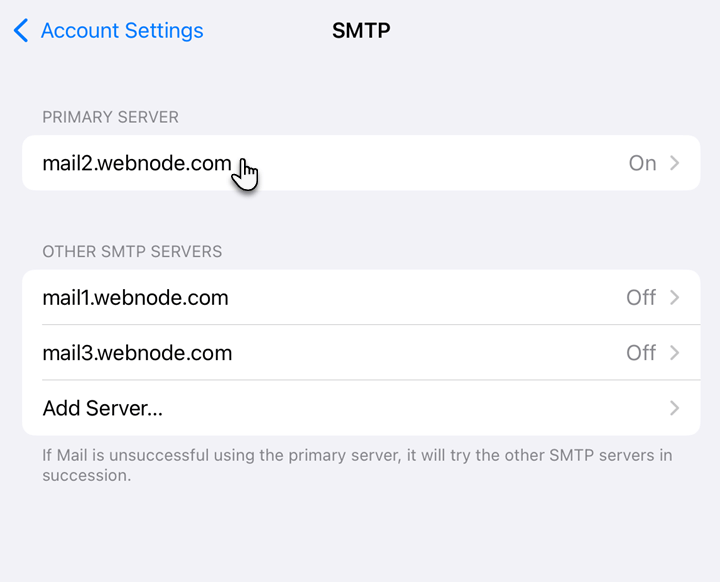
6. Choose the primary server.
7. Change the Host Name field to smtp.mail.webnode.com. Enable Use SSL and set the Server Port to 587. Confirm by tapping Done.
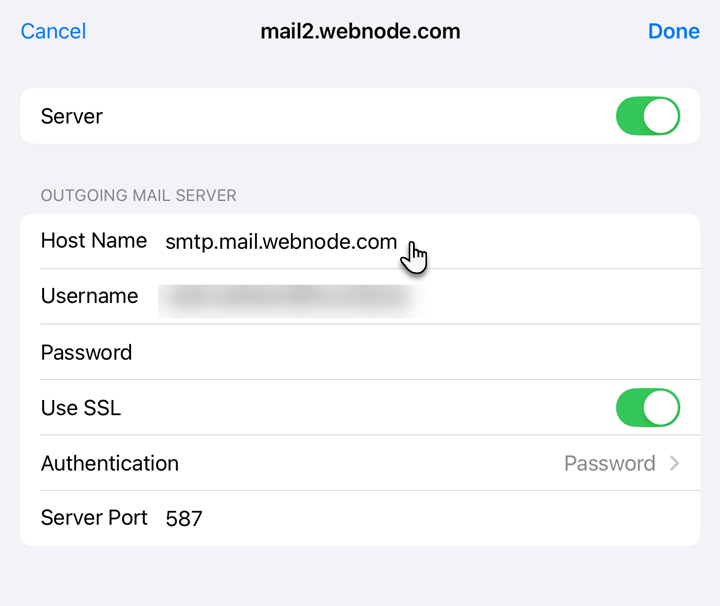
8. Go back and confirm again by tapping Done.