In this guide, you will learn how to set up an automatic signature in the Webnode email interface.
Inserting an automatic signature
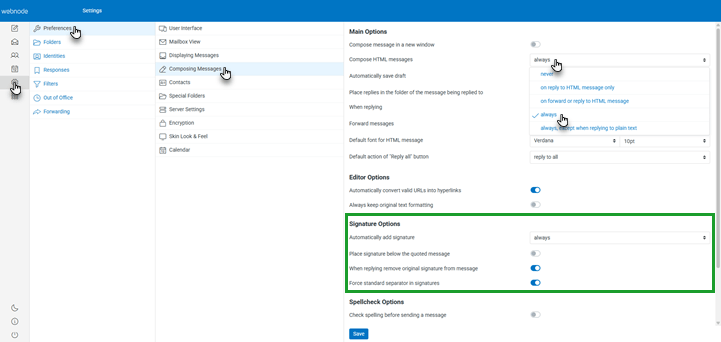
1. If you want to insert images, links, or custom formatting into the automatic signature, you first need to enable HTML. To do this, go to Settings in your mailbox, then Properties, and then Compose Messages, where you enable creating HTML messages. We recommend selecting the Always option.
TIP: In the section below, you can also set general signature properties.
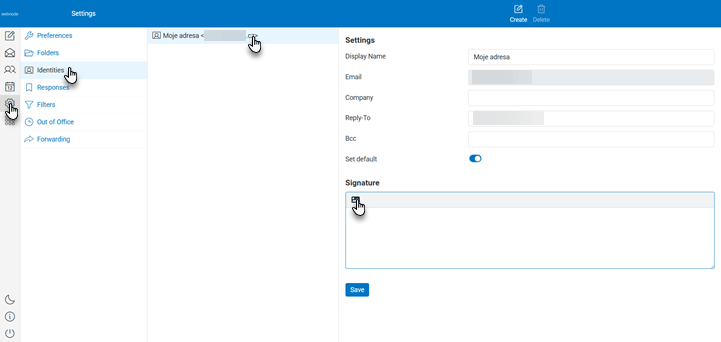
2. Now you can set up the signature itself by going to Settings, selecting Profiles, choosing your specific account, and clicking the 'image' icon in the Signature section.
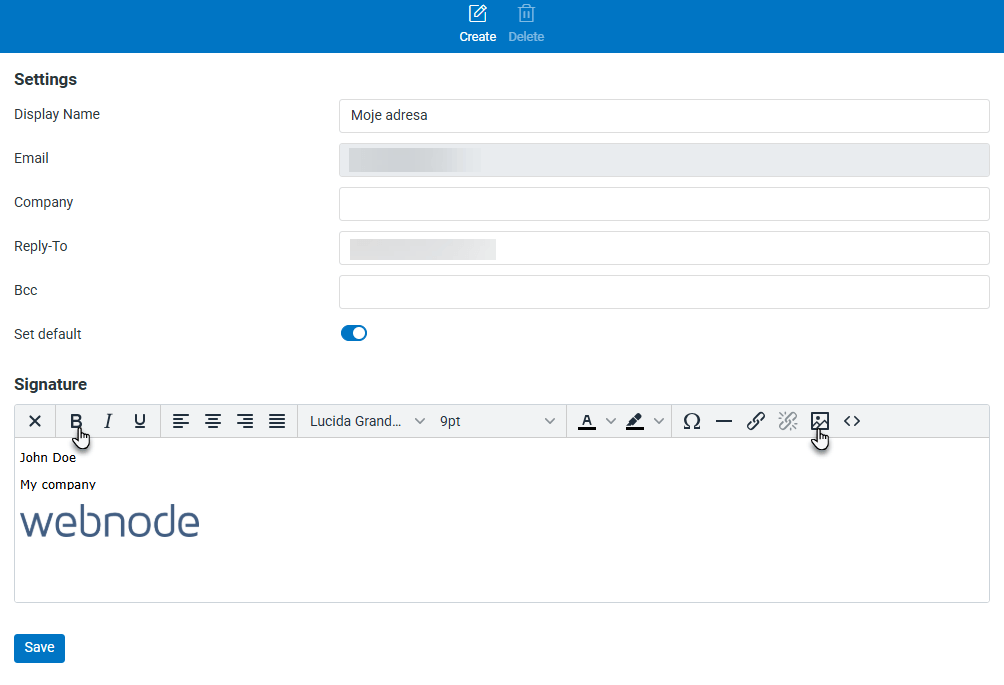
3. Here you work with the signature as in a standard text editor – you can insert images, links, bold text, change fonts, etc. Don't forget to Save the change using the related button.
TIP: If you use an external email client such as Outlook, you will need to set up the signature directly in it. In this regard, we recommend visiting the help section of that particular email client.